When viewing on mobile, scroll right for internal temperatures and scroll down for handling tips.
Type of roast
Oven temperature
Cooking time
Internal temperature (medium rare)
Internal temperature (medium)
Beef tenderloin Whole (5-7 lbs)
425°F
40-55 mins
125°F
140°F
Beef tenderloin Half (2-3 lbs)
425°F
30-40 mins
125°F
140°F
Prime rib (boneless) Whole
350°F
10-15 mins / lb
130°F
140°F
Prime rib (boneless) Half
350°F
15-18 mins / lb
130°F
140°F
Prime rib (bone-in) Whole (16-20 lbs)
325°F
10-15 mins / lb
130°F
145°F
Prime rib (bone-in) Half
325°F
13-15 mins / lb
130°F
145°F
Rump roast Holiday short cut, whole
350°F
12-15 mins / lb
130°F
145°F
Rump roast Holiday short cut, half
350°F
17-20 mins / lb
130°F
145°F
Sirloin strip roast Whole
350°F
1½ – 1¾ hours
125°F
140°F
Sirloin strip roast Half (5-6 lbs)
350°F
1¼ hours
125°F
140°F
Top sirloin roast Whole
350°F
12-15 mins / lb
125°F
140°F
Top sirloin roast Half
350°F
17-20 mins / lb
125°F
140°F
Stuffed roast Lamb, pork, beef, veal
350°F
20-25 mins / lb
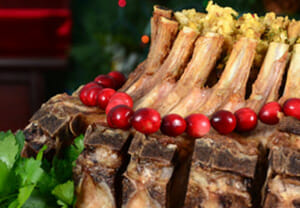
Rack of lamb
425°F
25 mins
Veal roast (boneless)
350°F
20 mins / lb
Tips
Bring roast to room temperature one hour prior to cooking.
Preheat oven a half hour before putting the roast into the oven.
Use the time chart as a general guide. Check the roast before the minimum time recommendation because each oven is different, and times will vary.
We recommend you use either a meat thermometer, which stays in the roast as it cooks, or an instant thermometer, which does not stay in the oven.
The thermometer must be placed in the center of the roast, and must not touch a bone.
Take the roast out when the thermometer reaches 5° less than the desired temperature, because the roast will continue to cook after it is removed from the oven.
Once you’ve removed the roast from the oven, let it stand 20-30 minutes before carving and serving.
Roast all meat uncovered, on a rack, without water.
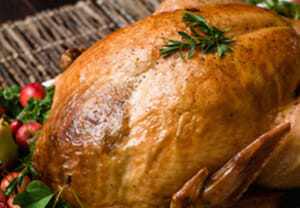
We have gathered our roasting guides in one place. Find your favorite holiday meat below and click the roasting guide for instructions on how to make the star of the show into a delicious holiday meal.
Rub turkey with softened butter or margarine. If desired, season with salt and pepper.
Place turkey in roasting pan, breast side up, and cover entire pan loosely with aluminum foil.
Use cooking chart below to determine oven time:
WEIGHT (POUNDS)
OVEN TIME FOR UNSTUFFED TURKEY
10 TO 14
3 TO 3 ½ HOURS
14 TO 18
3 ½ TO 4 HOURS
18 TO 20
4 TO 4 ½ HOURS
20 TO 24
4 TO 5 HOURS
24 TO 30
4 ½ TO 5 ½ HOURS
These times are approximations. We suggest the use of a meat thermometer to ensure proper preparation. When done, meat thermometer should read 180 degrees Fahrenheit at inner thigh.
Remove aluminum foil for the last 45 minutes of cooking to brown and crisp the skin. Let turkey rest 20 minutes after removing from the oven.
If you stuff the turkey, follow steps 1 through 4 above, then:
Important: when mixing stuffing, be sure all ingredients are cold (45 degrees or less).
Stuff the body and neck cavities with stuffing (do not stuff too tightly; the crumbs should remain somewhat loose). Stuff turkey as close to roasting time as possible.
Close the neck and body cavities with a trussing needle or needle and thread.
Rub turkey with softened butter or margarine. If desired, season with salt and pepper.
Place turkey in roasting pan, breast side up, and cover entire pan loosely with aluminum foil.
Use cooking chart below to determine oven time:
WEIGHT (POUNDS)
OVEN TIME FOR STUFFED TURKEY
10 TO 14
3 ½ TO 4 HOURS
14 TO 18
4 TO 4 ½ HOURS
18 TO 20
4 ½ TO 5 HOURS
20 TO 24
5 TO 5 ½ HOURS
24 TO 30
5 ½ TO 6 ½ HOURS
These times are approximations. We suggest the use of a meat thermometer to ensure proper preparation. When done, meat thermometer should read 180 degrees Fahrenheit at inner thigh.
Remove aluminum foil for the last 45 minutes of cooking to brown and crisp the skin. Let turkey rest 20 minutes after removing from the oven. Remove all threads or strings before carving.
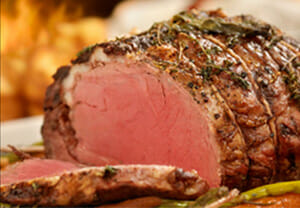
If you’ve ever cooked a roast, you might have followed our Beef Roasting Guide for instructions on what temperature to set the oven, how long to cook it, and how to know when your roast is done to your liking. The basic steps for successful oven roasting apply to any cut of meat.
Take your roast out of the fridge and take the chill off by letting it come up to room temperature. This can take about an hour.
While you’re waiting, preheat your oven to the recommended temperature. You’ll notice our chart selects low to moderate heat, in the range of 325 or 350 degrees, for larger roasts and higher heat, above 400 degrees, for smaller, tender roasts to produce the best results. That’s because large roasts need to cook slowly and evenly, or else the outside of the meat would cook too fast before the inside is done.
Place the roast on a rack in a roasting pan. A heavy pan is best, for even distribution of heat. The rack will prevent the meat from sitting in the drippings. If you don’t have a roasting rack, a wire cooling rack in the bottom of the pan will help raise the meat above the liquid. Do not cover your roast or put any water in the pan.
A meat thermometer is another important tool. If you have an ovenproof one, insert it into the thickest part of the beef, usually the center. An instant read thermometer works, too, but don’t leave it in while the meat is cooking. If you don’t have a meat thermometer, you can pick one up at Butcher Boy while shopping for your roast.
Take your roast out of the oven and give it a rest when the thermometer reads about 5 or more degrees less than your target temperature for doneness. Transfer the meat to a cutting board, cover it loosely with aluminum foil, let it sit about 15 minutes. It all depends on the size of the roast. Your roast will continue cooking and reach that perfect temperature. Resting also allows juices to redistribute inside the meat.
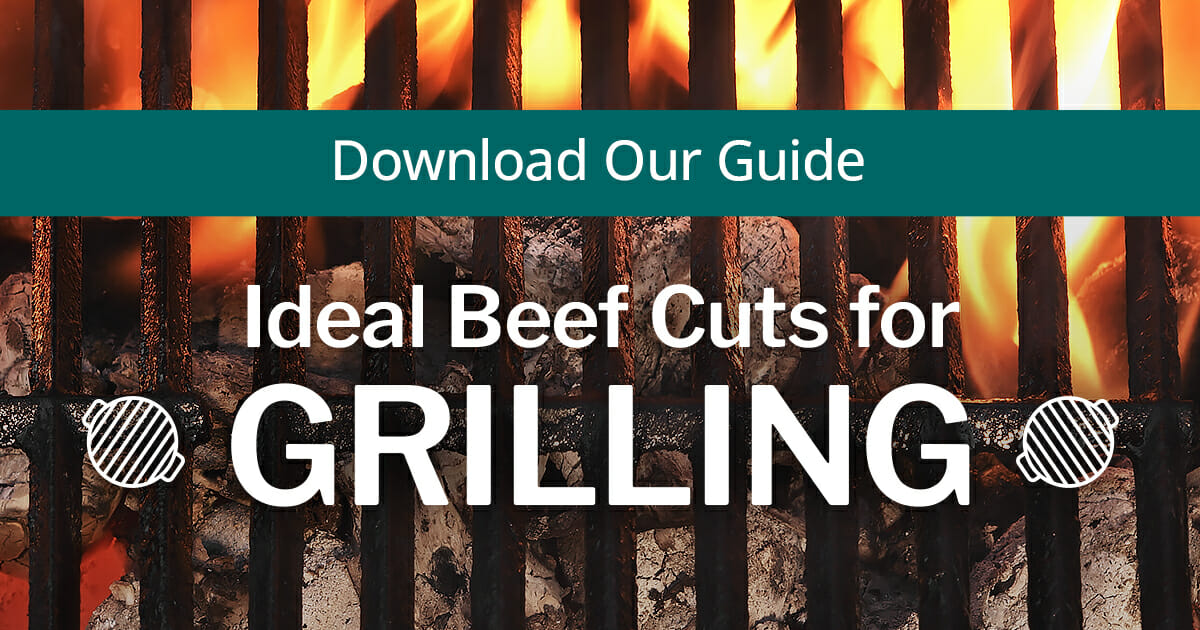
Are you looking for some inspiration for your next roast? Visit Butcher Boy and let our experts help you decide which cuts of beef are ideal. Any of these recipes can get you started after you’ve shopped our aisles for all your ingredients:
This smoked herb rib roast will surely impress for special occasions, but is simple enough for a cozy weekend meal any time.
If you have any questions about how to cook a roast, whether you’re unsure about the oven temperature for a certain type or size of roast, or how much cooking time it takes to get just the right doneness, Butcher Boy can help. And don’t forget to let us know how it turned out the next time you stop in!
2. Put corned beef in a large pot. Add bay leaf and enough water to cover beef by 1-2 inches. Cook over high heat until water boils. Reduce heat, simmer for 3 hours or until meat is tender when pierced with a fork.
3. About 40 minutes before meat is done, add remaining vegetables, except for cabbage & parsnips.
4. Twenty minutes before meat is done, add cabbage & parsnips, simmer until vegetables are tender.
To Make Corned Spare Ribs
1. Follow directions for corned beef but cook 1½-2 hours.
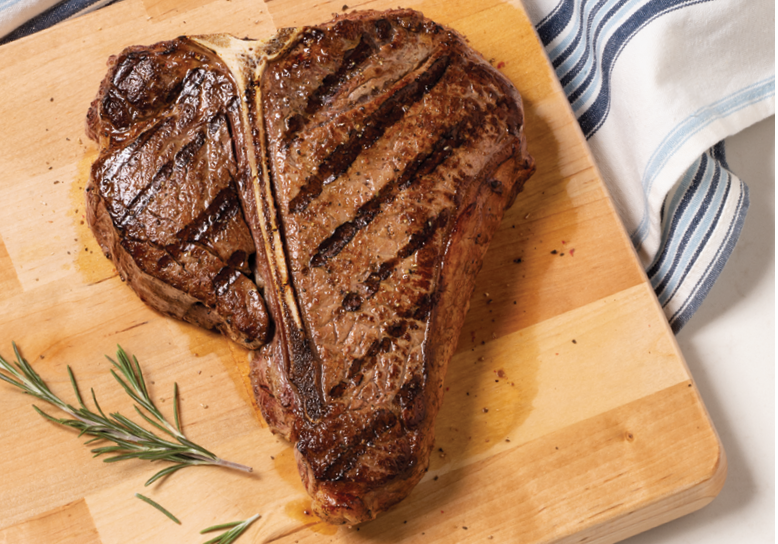
Some home cooks are a little intimidated by preparing steak. With various levels of doneness, how can you be sure to meet the personal preferences of your guests? Since there’s nothing quite like a good steak cooked to perfection, and we have some advice to make sure you hit the mark every time.
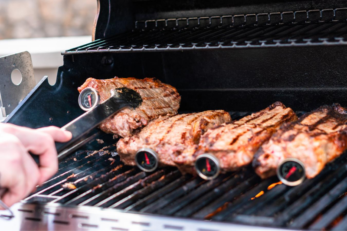
We’ve shared a “handy” trick for testing a steak’s doneness without a thermometer. Sometimes, just feeling the steak will tell you the internal temperature, from rare to well done. Still, the most efficient way to check is with a meat thermometer, but you don’t want to check it too often while the beef is cooking. Probe thermometers that can stay in the meat as it cooks avoid the risk of juice leaking out.
When you’re using a grill or hot cast iron skillet, you should hear the beef sizzle when it goes on. Many chefs prefer either of those methods to best develop a delicious crust. Avoid flipping the steak in the pan or on the grates too much – perfection takes patience. If the steak is stuck to the surface when you try to move it, it’s not ready.
On the grill, it’s a good idea to have a slightly cooler area to set aside steaks that might be cooking too quickly at any point. Then they can continue cooking at a gentler, slower rate.
Remember that no matter how you cook your steak, the temperature for each level of doneness is always the same:
Rare, with a cool red center should read 110-120°F
Medium rare, with a warm red center is 120-130° F
Medium will result in a warm pink center at 130-140° F
Have you heard you should give your steak time to rest? It’s true that steaks will continue cooking once they’re removed from the heat, and flavorful juices that had been previously pushed to the center of the steak will be redistributed throughout the meat. Experts say to cook the steak about five degrees under your desired doneness temperature, then let it rest only about five minutes so it stops cooking when you cut into it.
Feeling more confident about how to know when your steak is done? Come into Butcher Boy and let us help you choose the best steaks for a delicious meal. We also have a selection of ready-made sides and fresh vegetables to go with it.
Don’t take the steak out of the fridge and throw it directly on the grill. To make sure the meat cooks evenly, let it come to room temperature first.
Oil the grill grates. When it’s time to flip the steak, it will turn easily and not stick.
Be patient and let the steak cook on one side for the full recommended time before turning it. Flipping a steak too often will disrupt the grilling time and dry it out.
Searing a steak creates tremendous flavor. After you get a good crust on steak thicker than an inch, grill it over indirect heat so that it won’t burn before it finishes cooking on the inside.
Don’t be afraid to use a digital thermometer to keep a more accurate eye on your steak.
Always let your steak rest for about five minutes after you take it off the grill and don’t cut into it before.
When it comes to cooking steak, there are no second chances. How do you make sure you’re not overcooking your meat? Taking the temperature with a thermometer can give you a quick, precise reading. But you’ll pierce your meat in the process, causing it to dry out and lose flavor.
Even worse, we see some people cut a big slice in the middle of their steak to check the center. That’s an easy way to make sure your steak is very well done — and not in the good way.
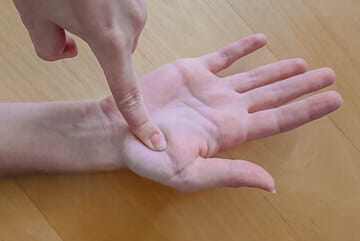
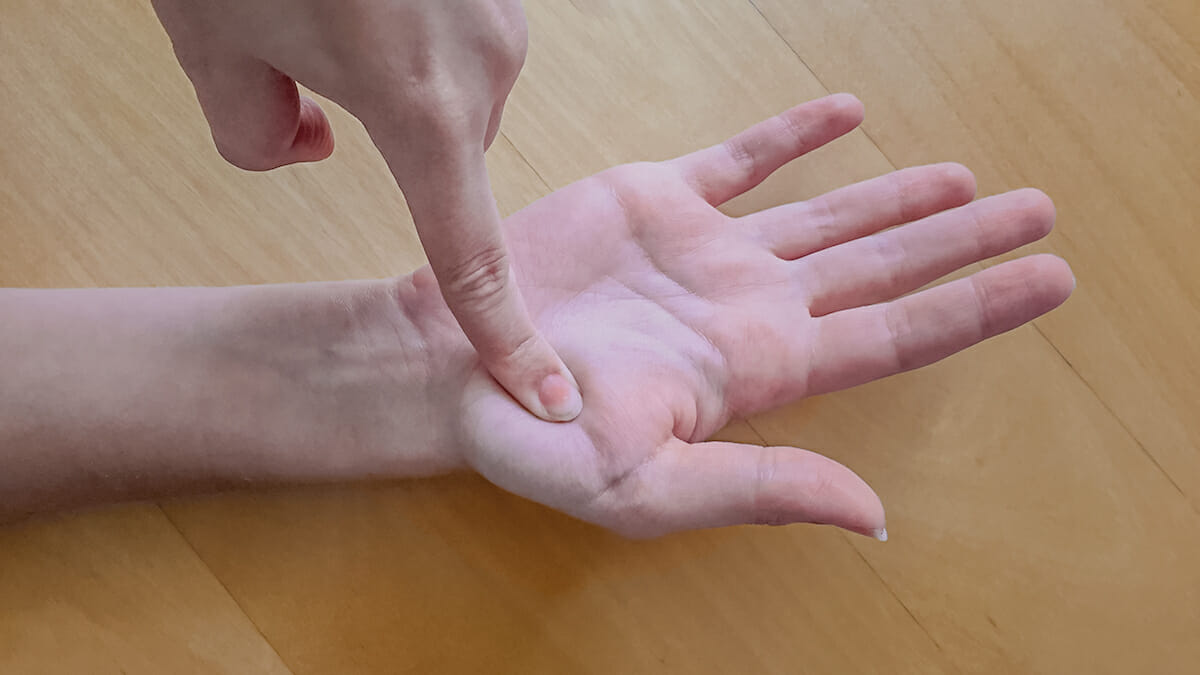
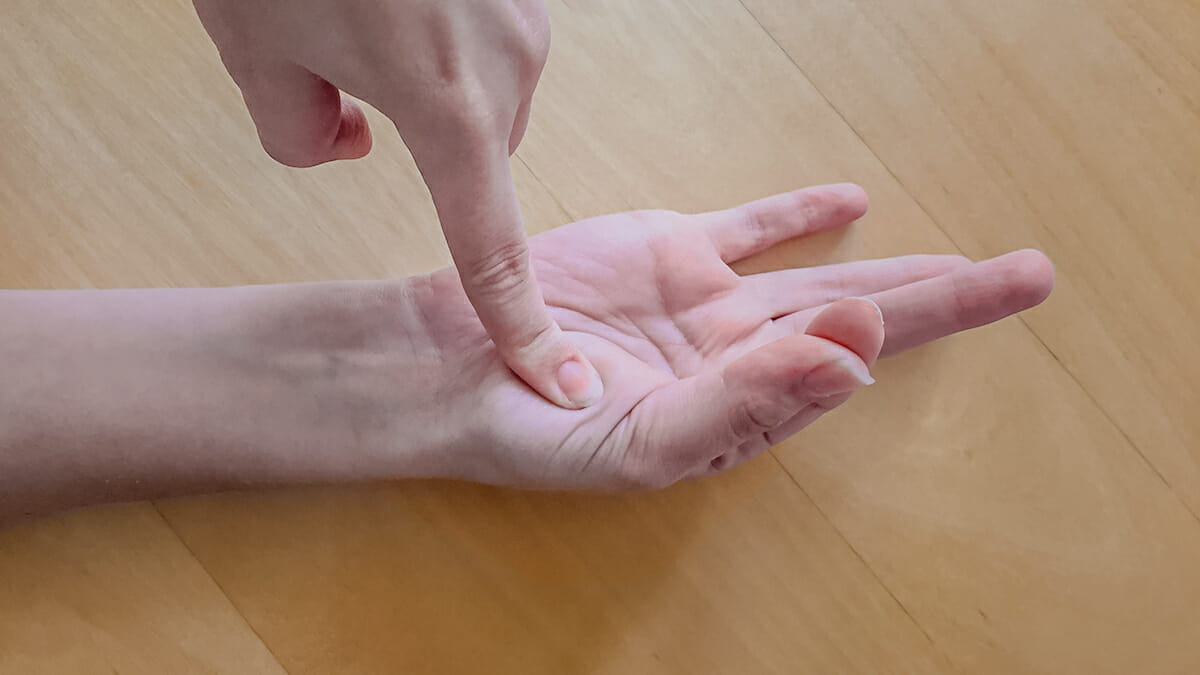
There’s a simple, surefire way to check your steak’s temperature without cutting into the meat, and all you need is your hand.
Raw
Feel the palm of your hand, just below your thumb. It’s a little soft and fleshy. This is what raw steak should feel like when you touch it.
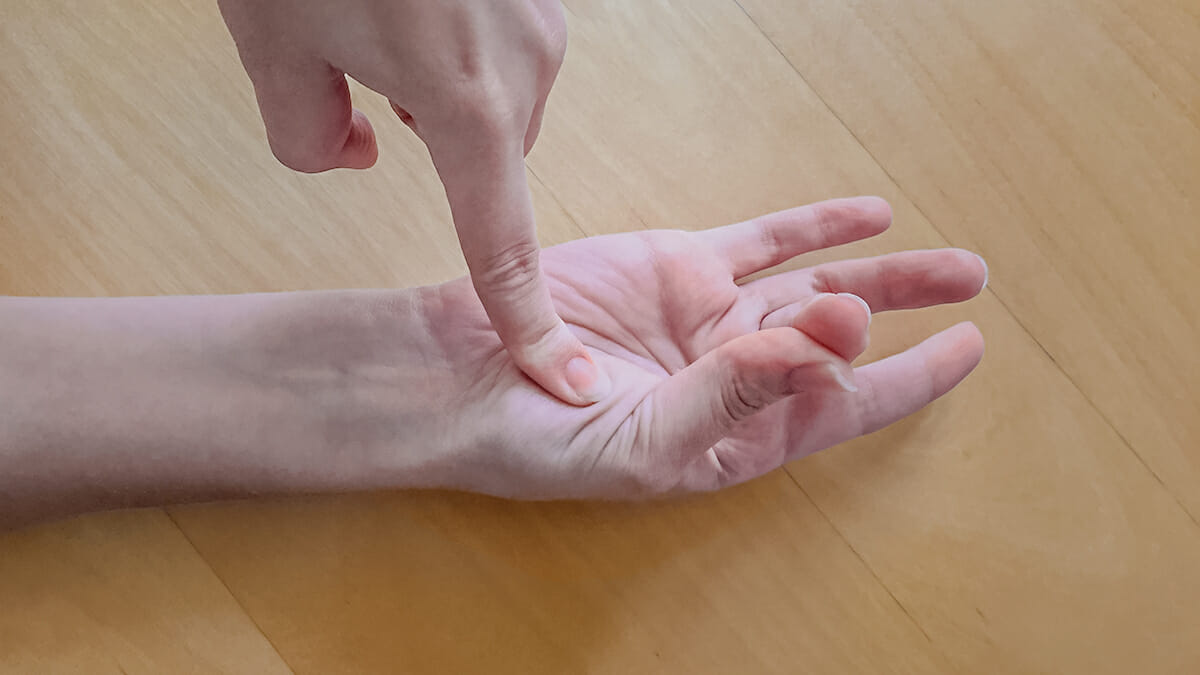
Rare
Now bring your thumb to your pointer finger, and touch that same part of your palm again. Did you notice how it’s slightly firmer? A rare steak should feel like this when you touch it.
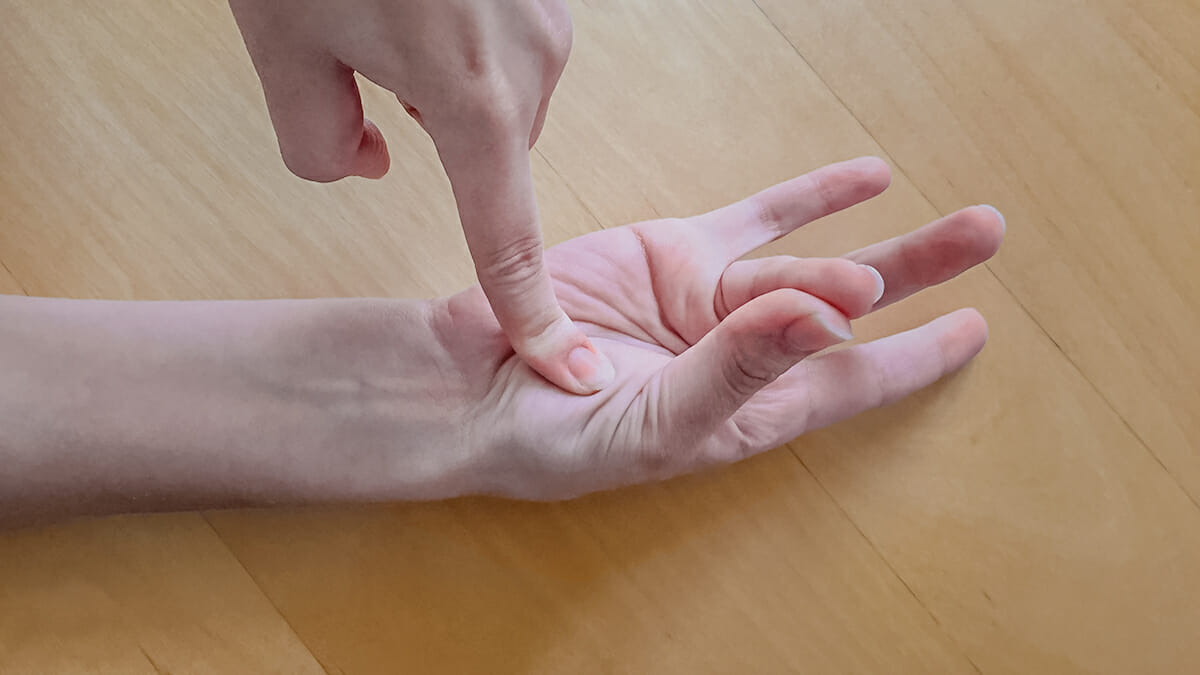
Medium-Rare
Touch your thumb to your middle finger. Notice how that section of your palm tenses up a little more? This is what a medium-rare steak feels like.
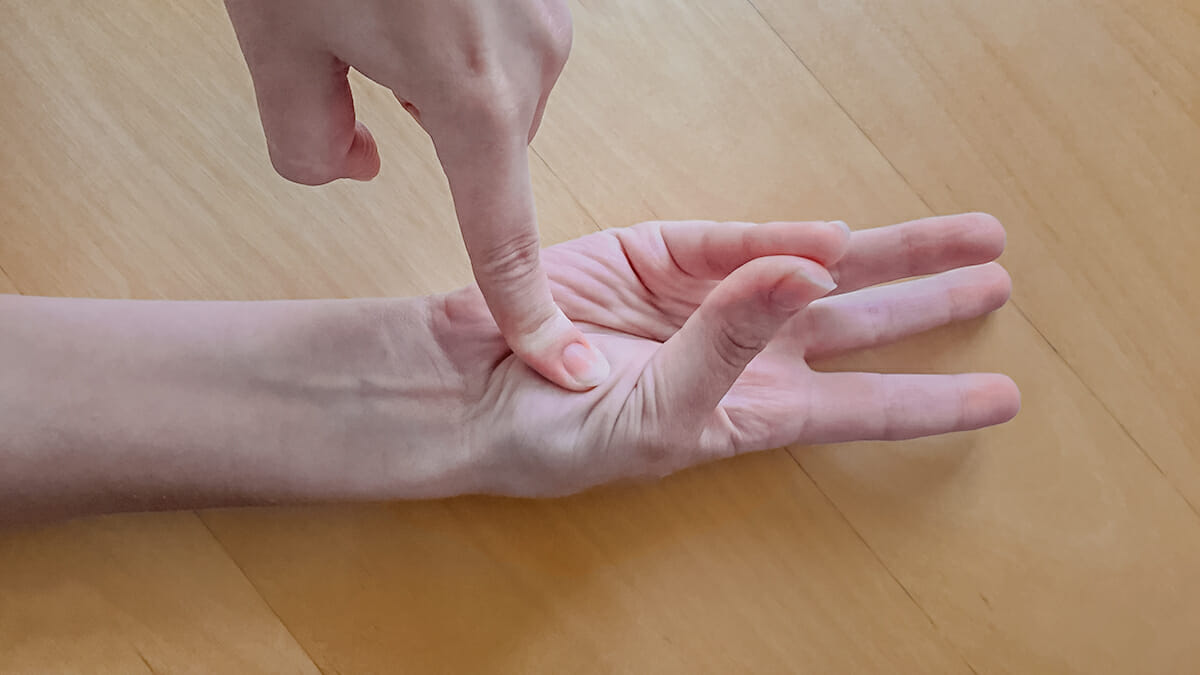
Medium
Move your thumb to your ring finger. Now the palm may feel slightly flexed. This level of firmness means your steak is cooked medium.
Well-Done
Now touch your thumb to your pinky. That section of your palm will be fairly firm. This is what a well-done steak feels like.
Kitchen pros rely on the hand test to cook their steaks to perfect temperature every time. You may be surprised by its accuracy. Give it a try, and tell us what you think.
For more steak know-how, visit our store in North Andover.
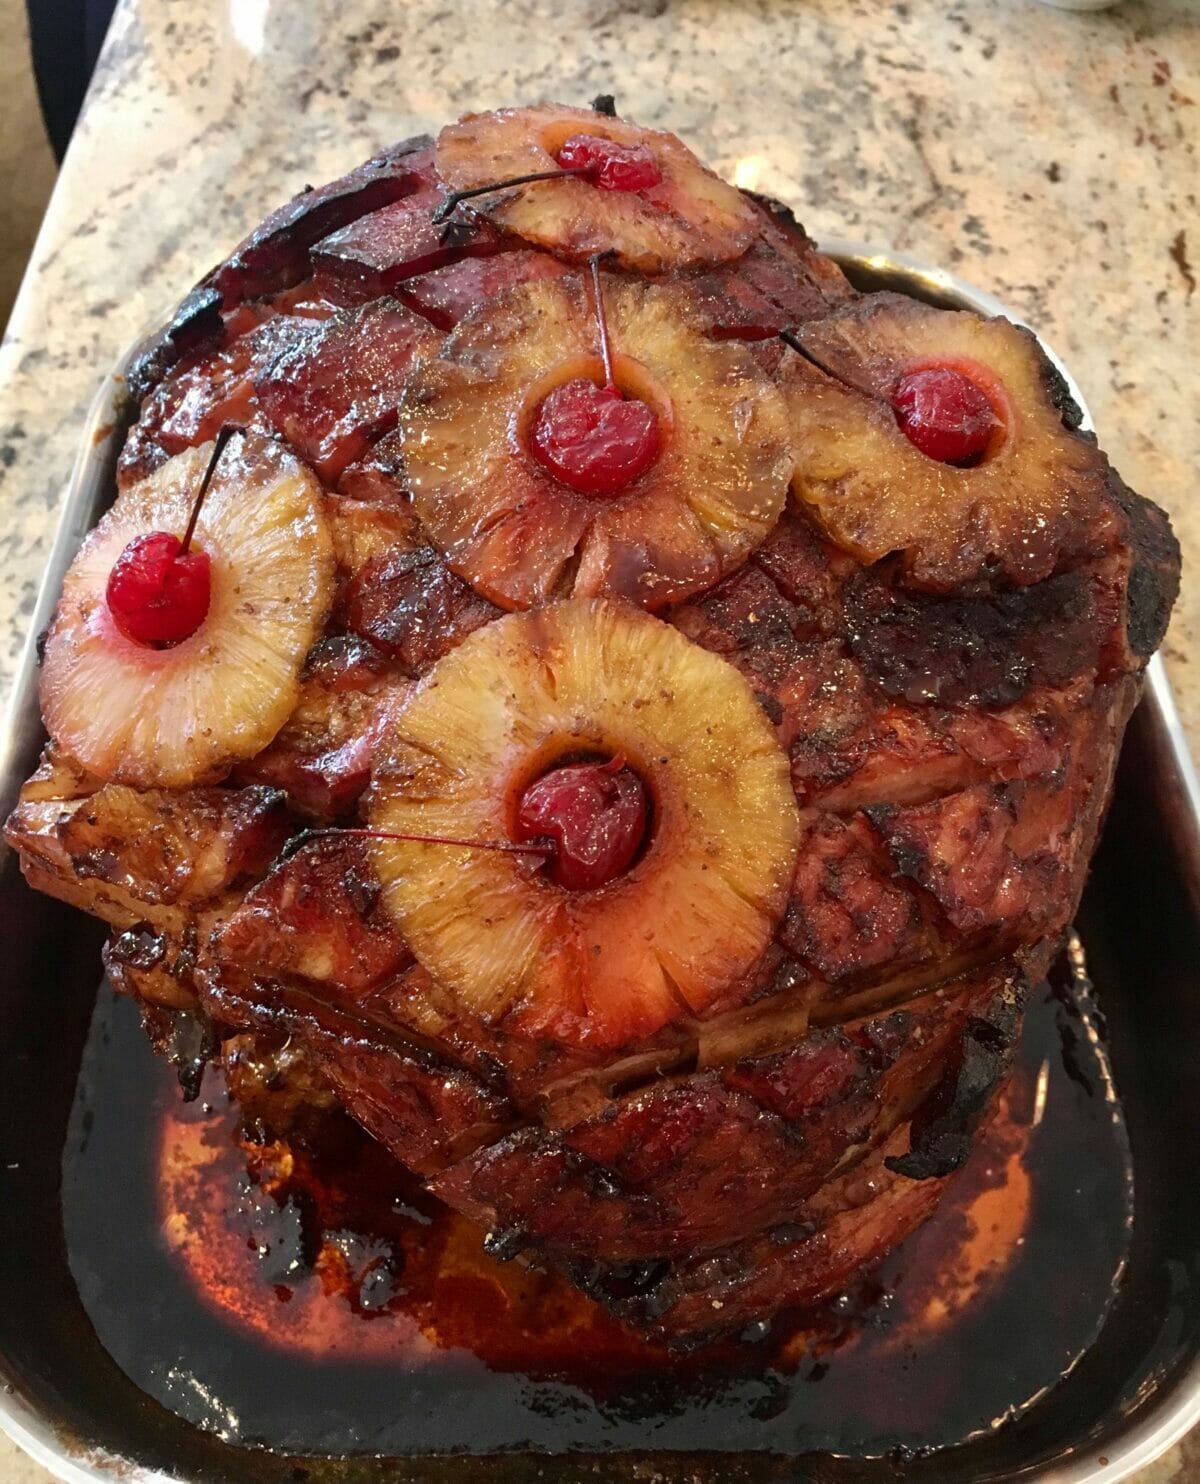
 All our hams are fully cooked. These directions are for heating the ham without drying it out.


 If you’ve ever cooked a roast, you might have followed our

 Some home cooks are a little intimidated by preparing steak. With various levels of doneness, how can you be sure to meet the personal preferences of your guests? Since there’s nothing quite like a good steak cooked to perfection, and we have some advice to make sure you hit the mark every time.